
Contact Us
+81 (0)120-470-056 (toll-free)
+81 (0)3-4332-6740
Call Center Support:24/7
wwesim@thesky.co.jp
Email Support:24/7
Responses are provided 9:00 AM–6:00 PM (JST)
FAQs
About Use
When eSIM connects to a local network and starts receiving a signal at your destination.
You can only check the data that has been used. Deduct the used data from your eSIM data plan to know the remaining data.
【iOS】Go to [Settings] > [Cellular Data] > See current period usage below [SIMs].
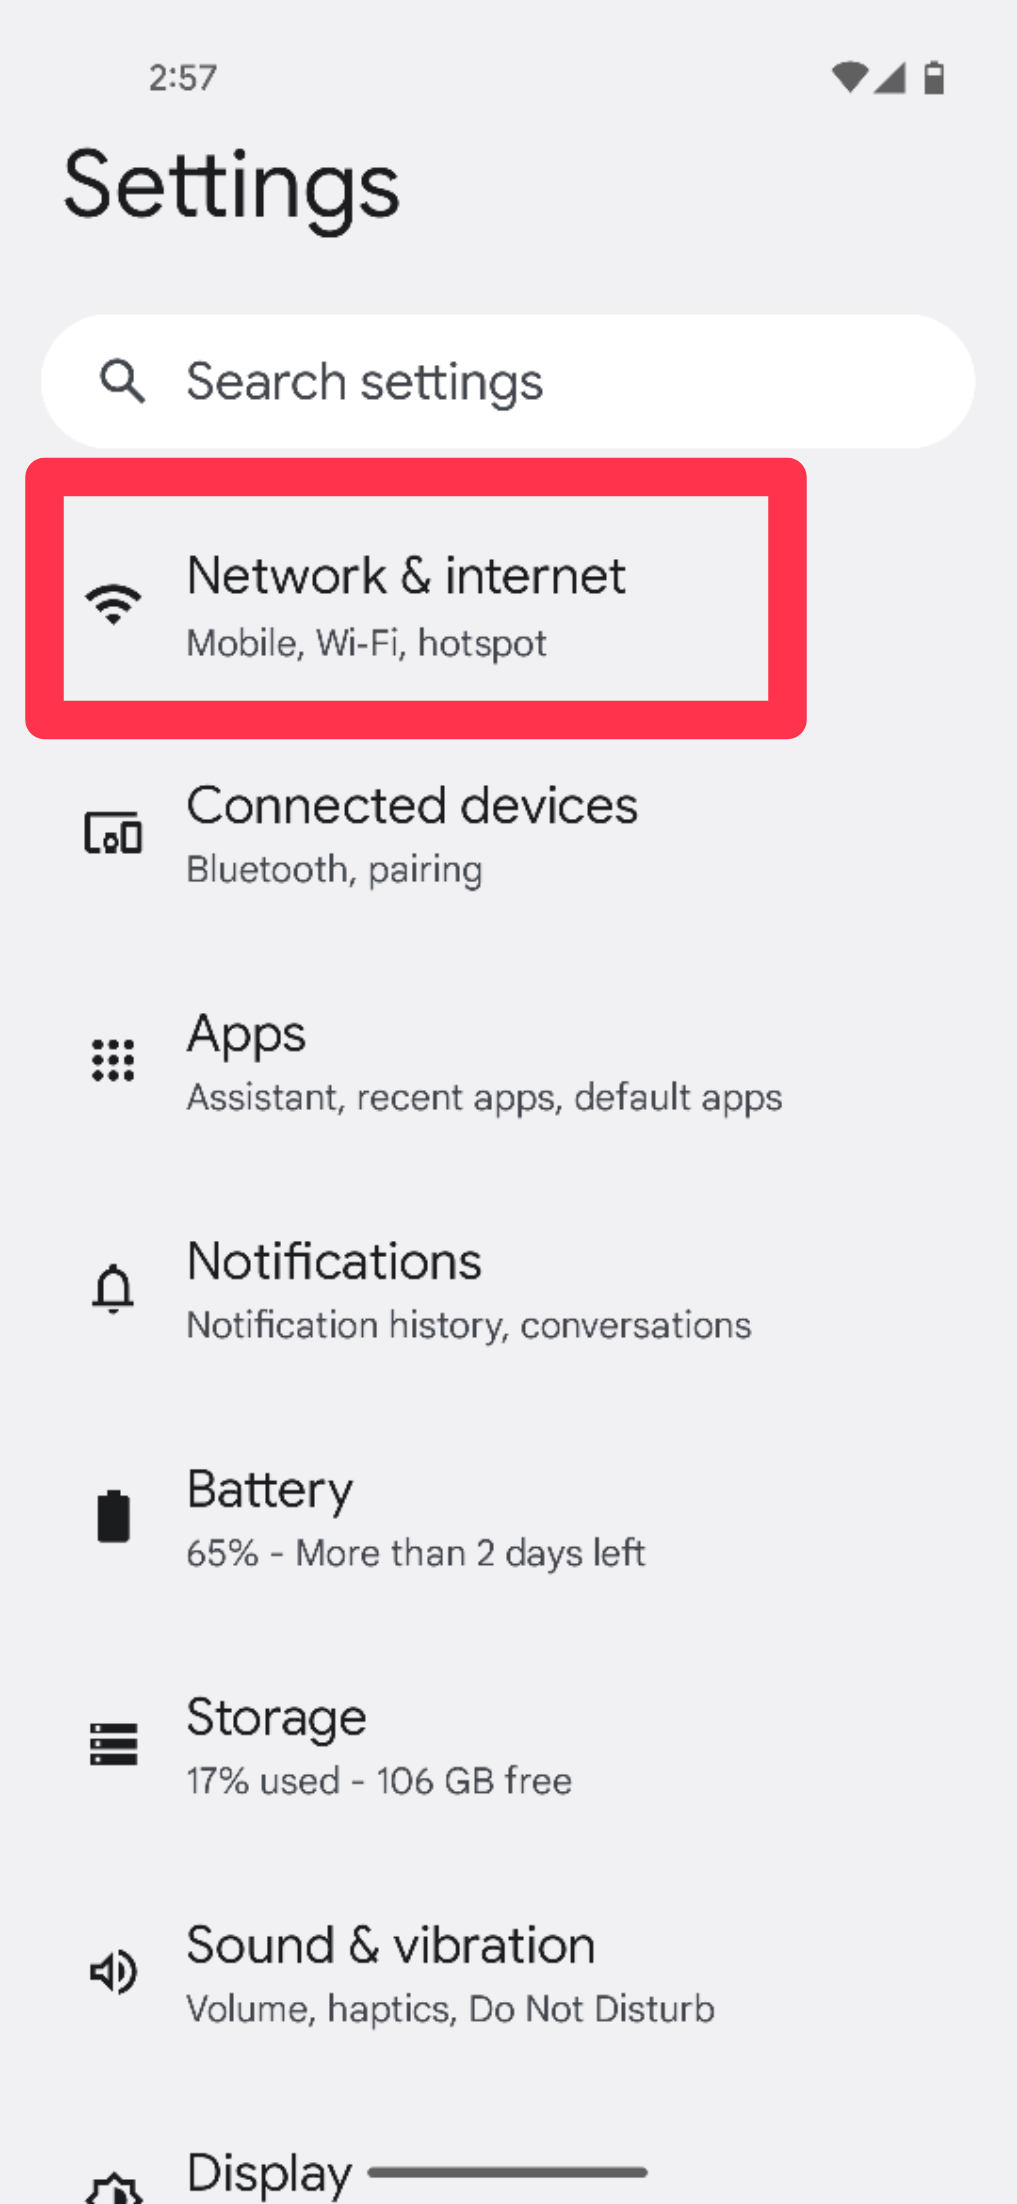
【Android】Go to [Settings] > [Network & Internet] > [Mobile Network] > Relevant SIM > Data Usage.
Once your data allowance is used up, the service will stop working, even if your validity period has not yet expired.
Services that require a phone number—such as voice calls, SMS, and two-factor authentication—are not supported.
However, you can make calls using internet-based apps like WhatsApp, KakaoTalk, Messenger, Viber, LINE, etc.
Having Trouble?
Please restart your smartphone and try installing the eSIM again.
Once the eSIM has been successfully installed, the QR code cannot be scanned again.
Do not delete the installed eSIM, as it may not be recoverable.
If you installed the eSIM outside your destination country, activation may not complete immediately.
It will activate automatically once your device connects to a local network at your destination.
Please check the following:
- Restart your smartphone.
- Connect to Wi-Fi and make sure the eSIM was installed and activated successfully.
- Delete all APN profiles of your other SIM(s).
- Turn off your VPN.
- Make sure your mobile data is turned on.
- Make sure you haven’t used up your data allowance or that your subscription period has not expired.
Others
Yes, we can issue a receipt in PDF format.
Please email us with the following information:
- Order number
- Purchase date
- Purchase amount
- Recipient name for the receipt
- Receipt language (English or Japanese)
eSIM Guide
- You must have Wi-Fi / internet connection during this process.
- Make sure your phone is NOT Network Locked.
- Be sure your Carrier has your phone “eSIM enabled”.
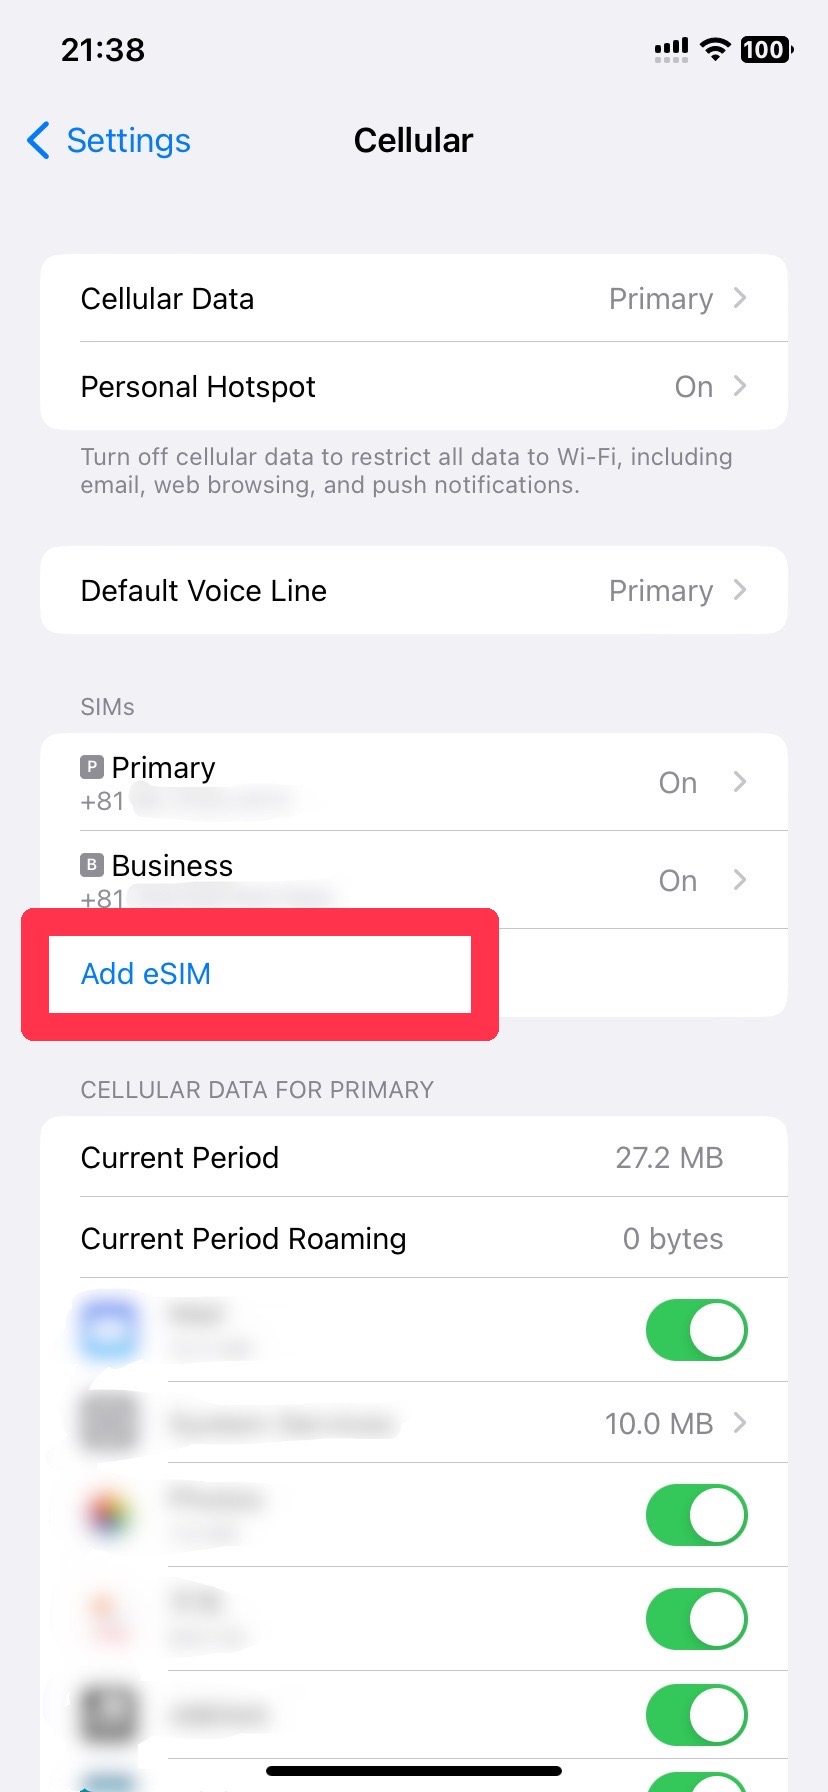
- Go to eSIM Installation Screen
- Open [Settings].
Go to [Cellular] and tap [Add eSIM].

- Scan the QR Code
- Tap [Use QR Code] and scan the eSIM-QR code on your receipt.
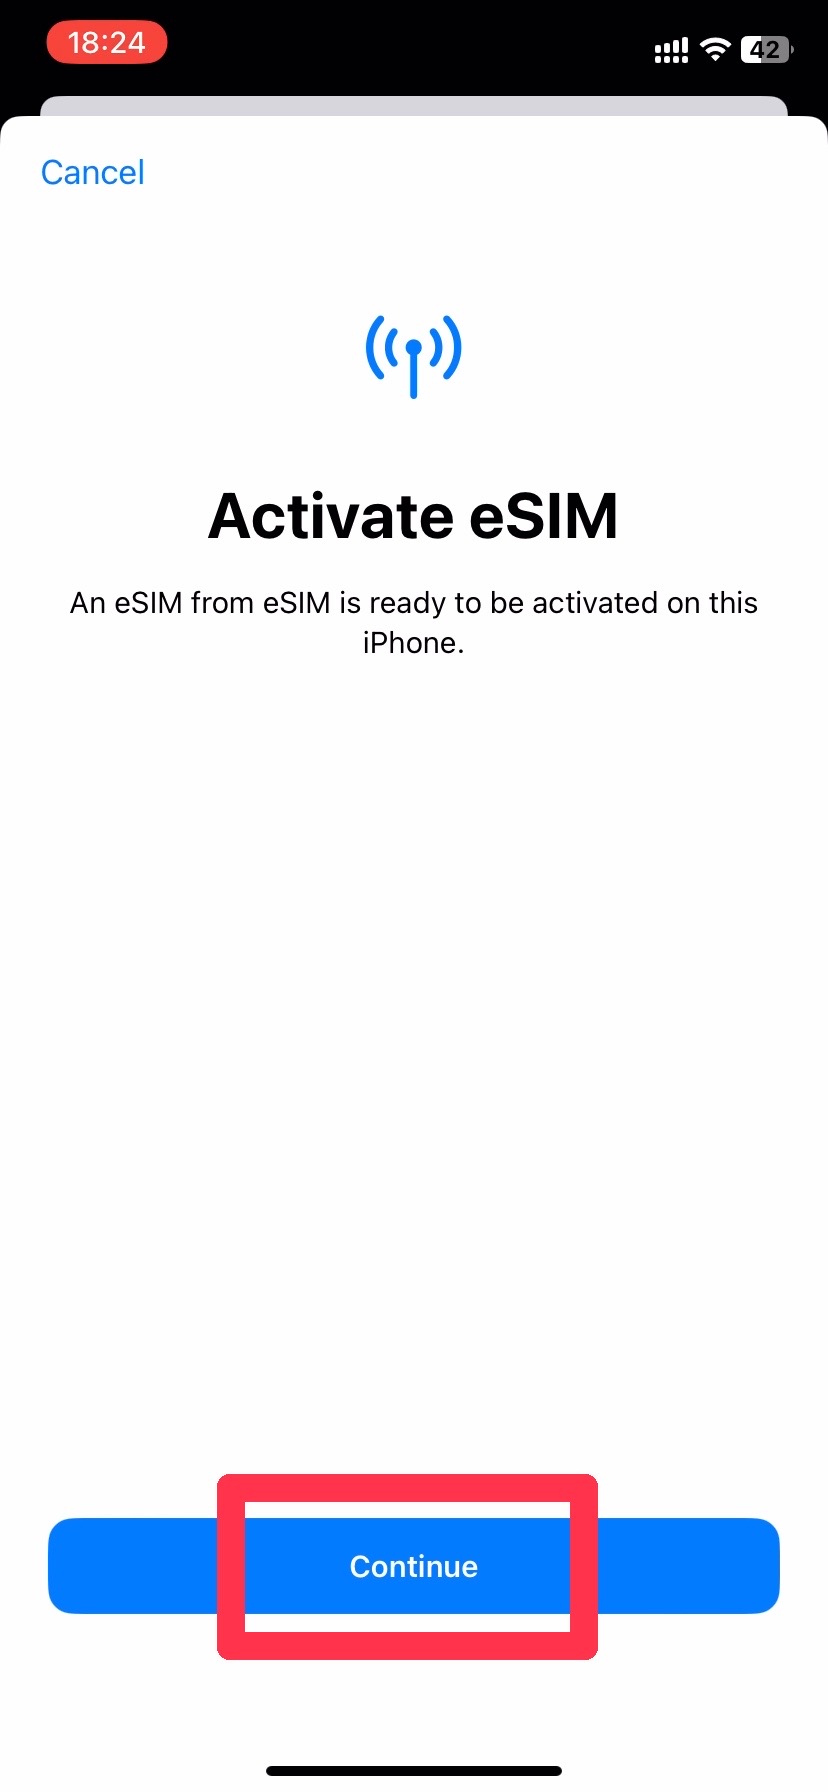
- Install eSIM
- Tap [Continue] to activate your eSIM.
Note: If you are doing this outside of your destination, you may see [Unable to activate eSIM] after a while.
If the status shows [Activating], don’t worry—it will automatically activate once you arrive at your destination.
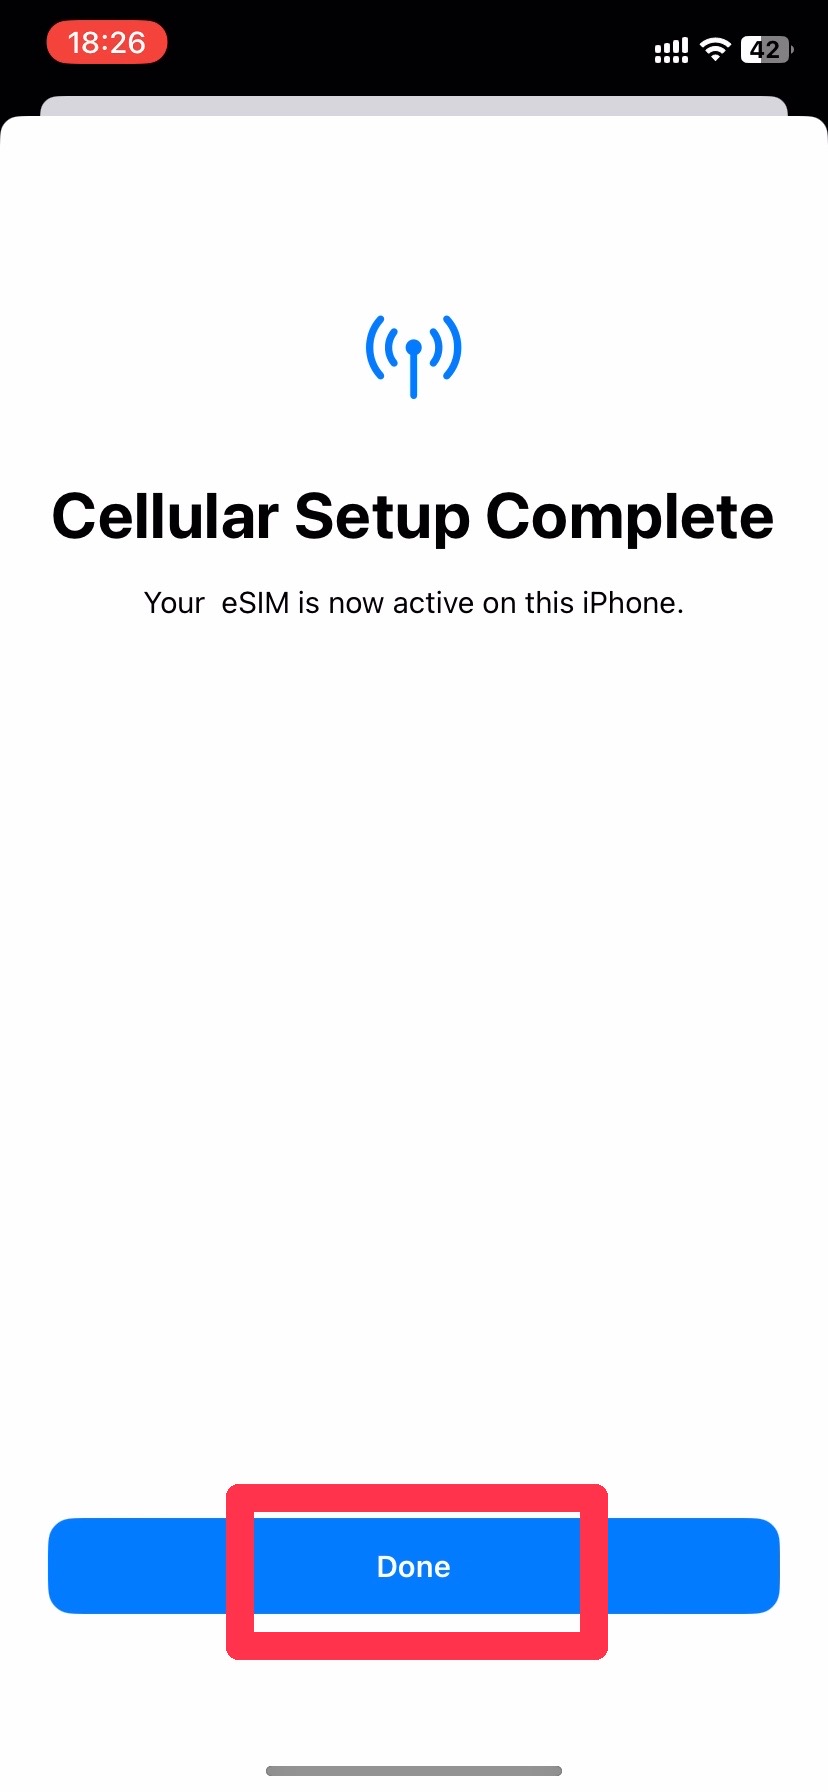
- eSIM Installation Complete
- Tap [Done].
- Go to Cellular Data Settings
- Open [Settings].
Go to [Cellular] and tap [Cellular Data].
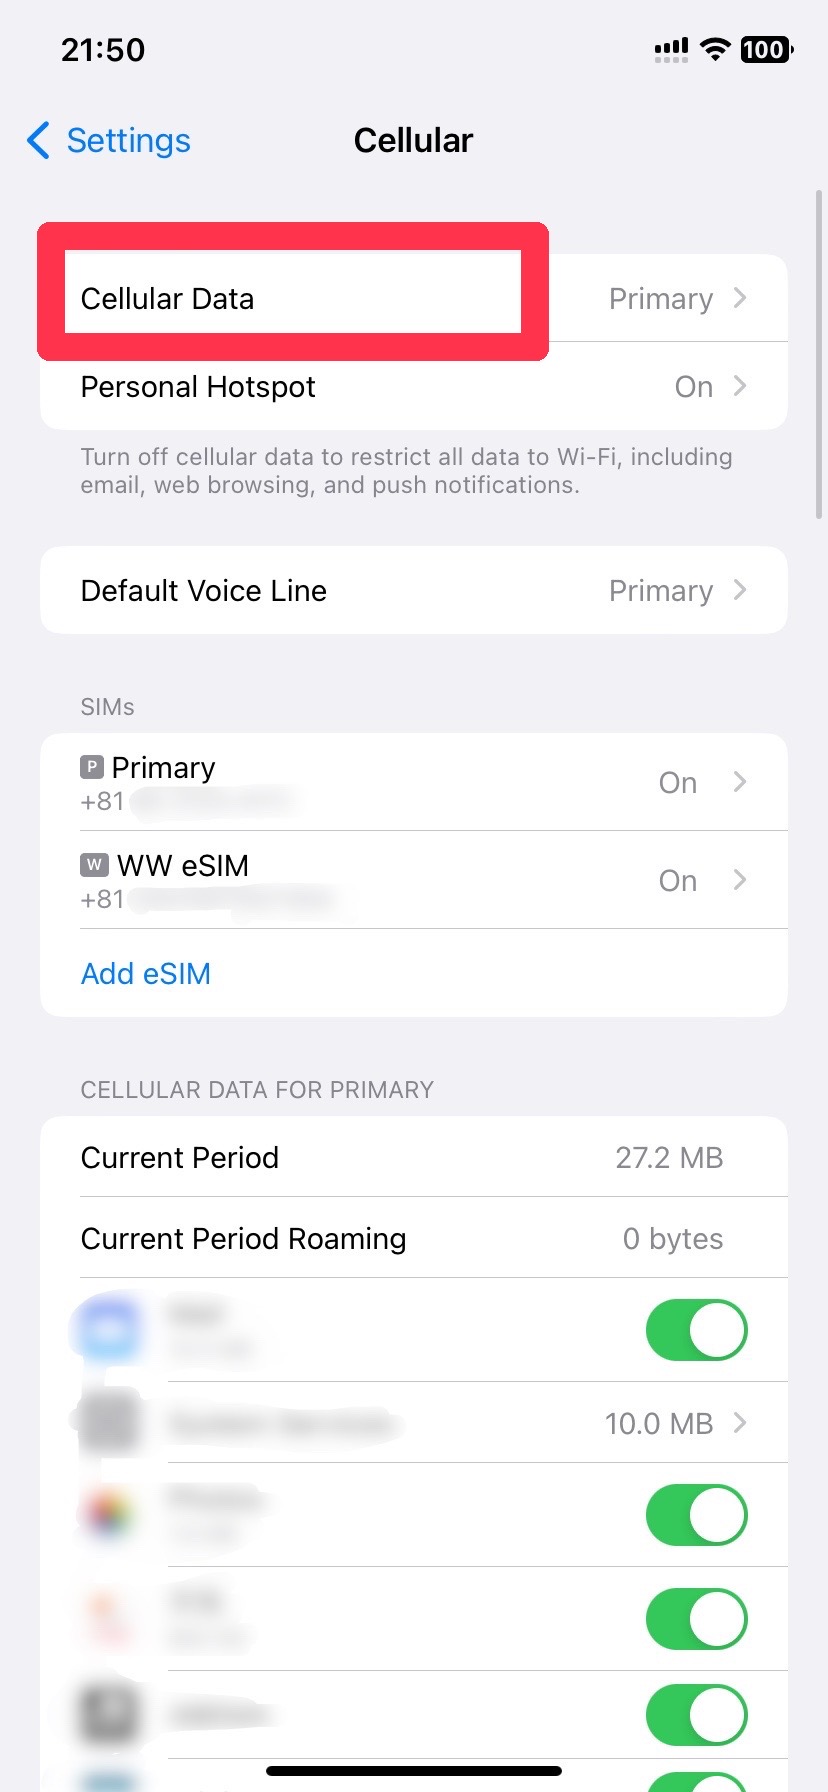
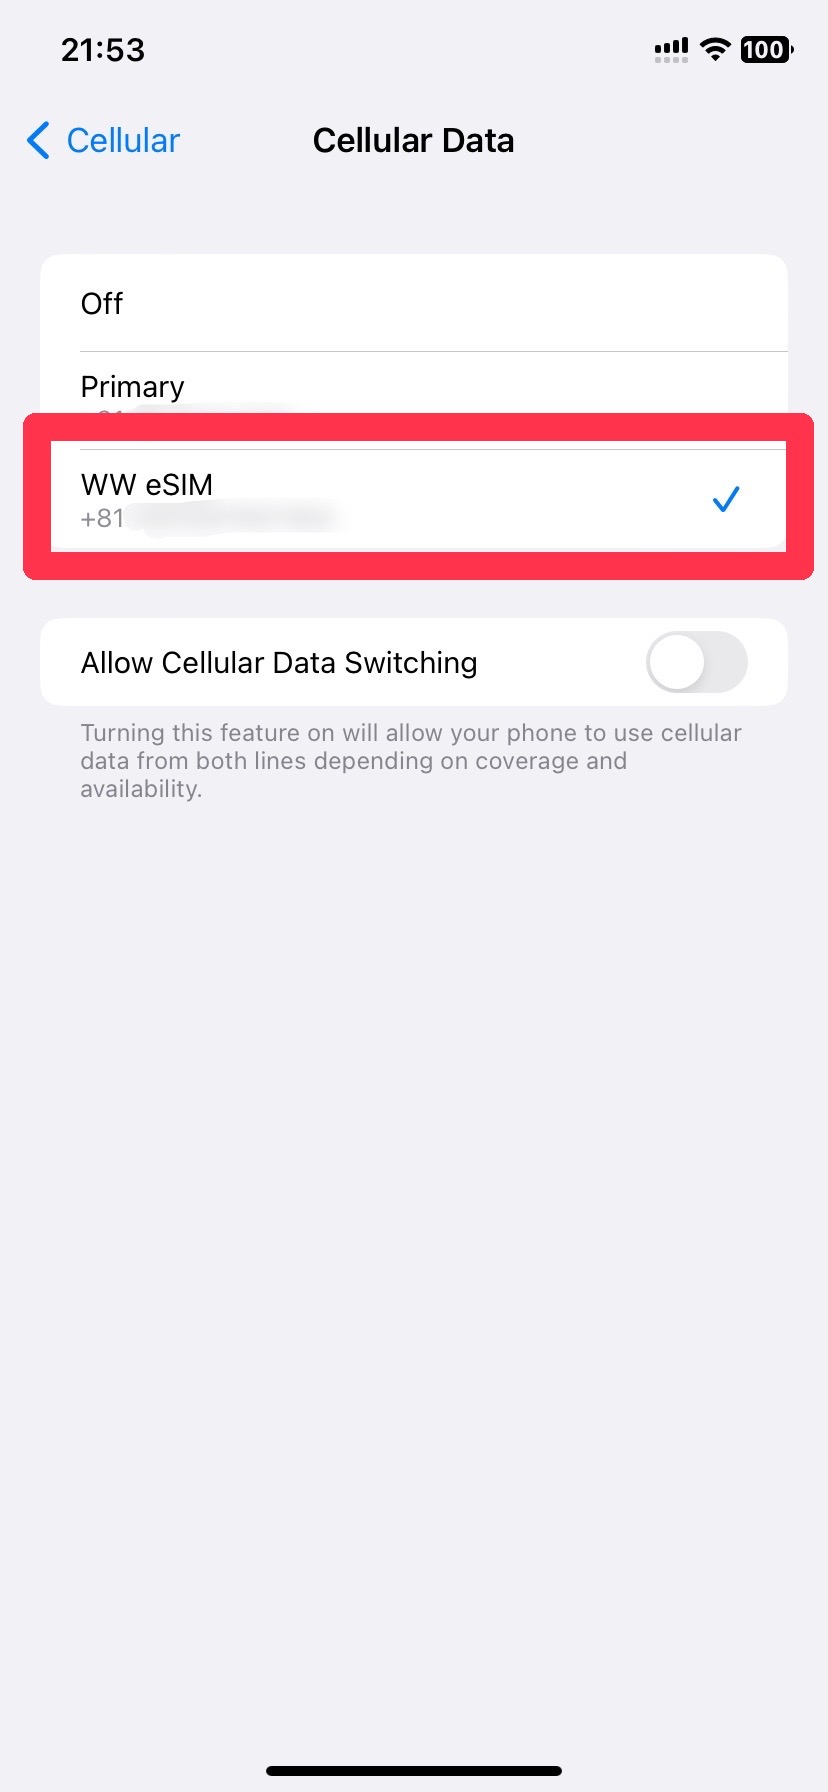
- Select Cellular Data
- Select the installed eSIM.
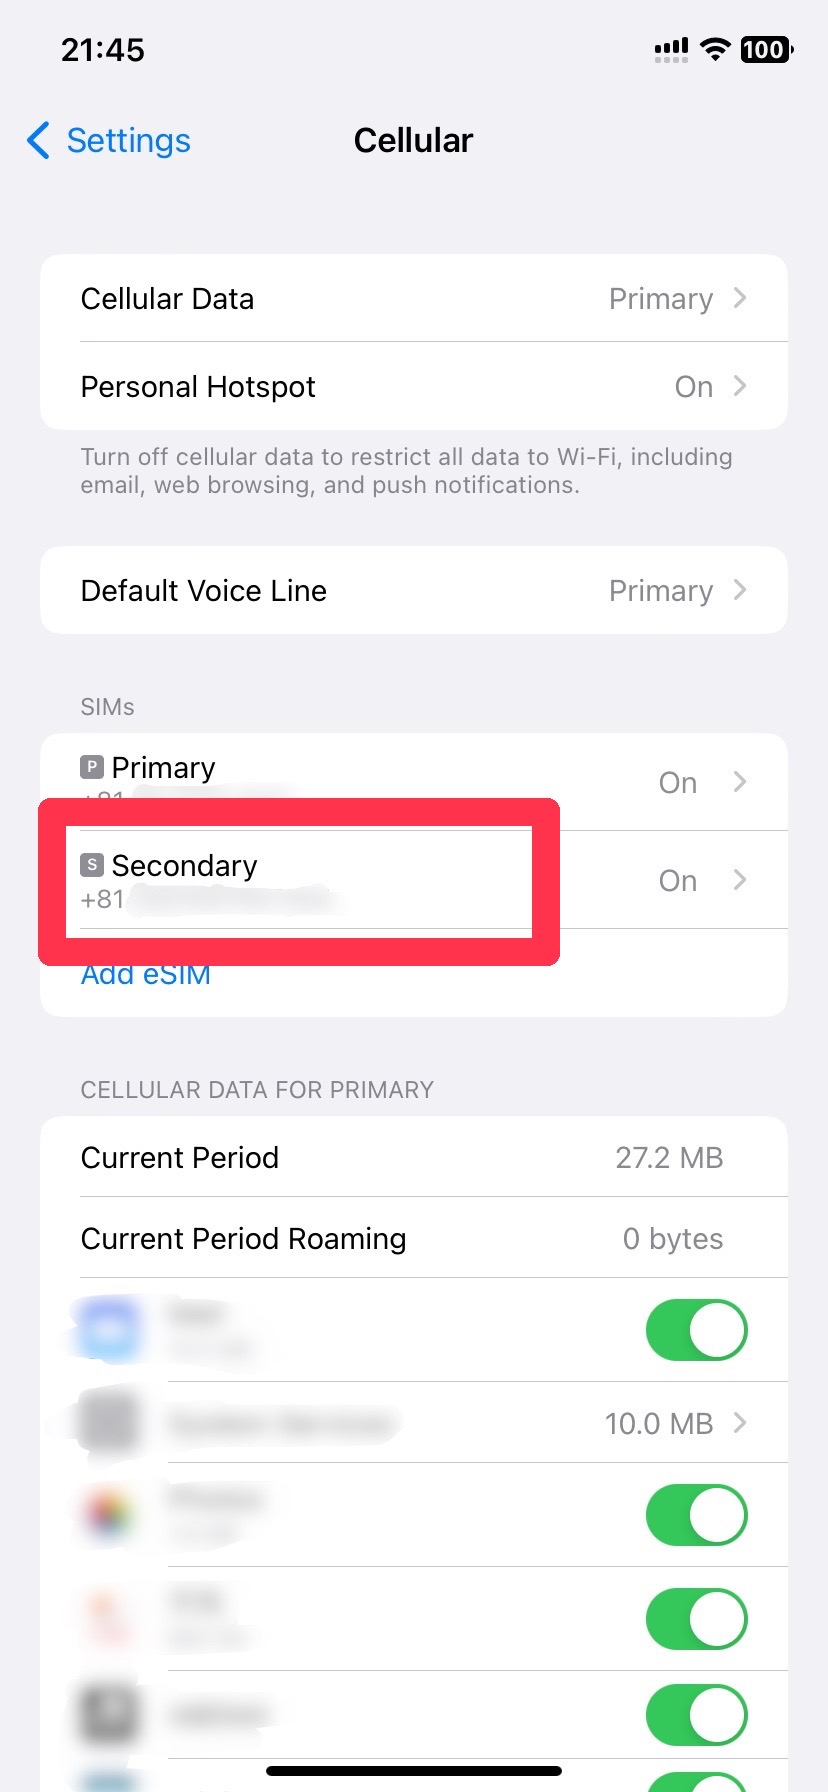
- Go to eSIM Settings
- Open [Settings].
Go to [Cellular] and tap the new eSIM.
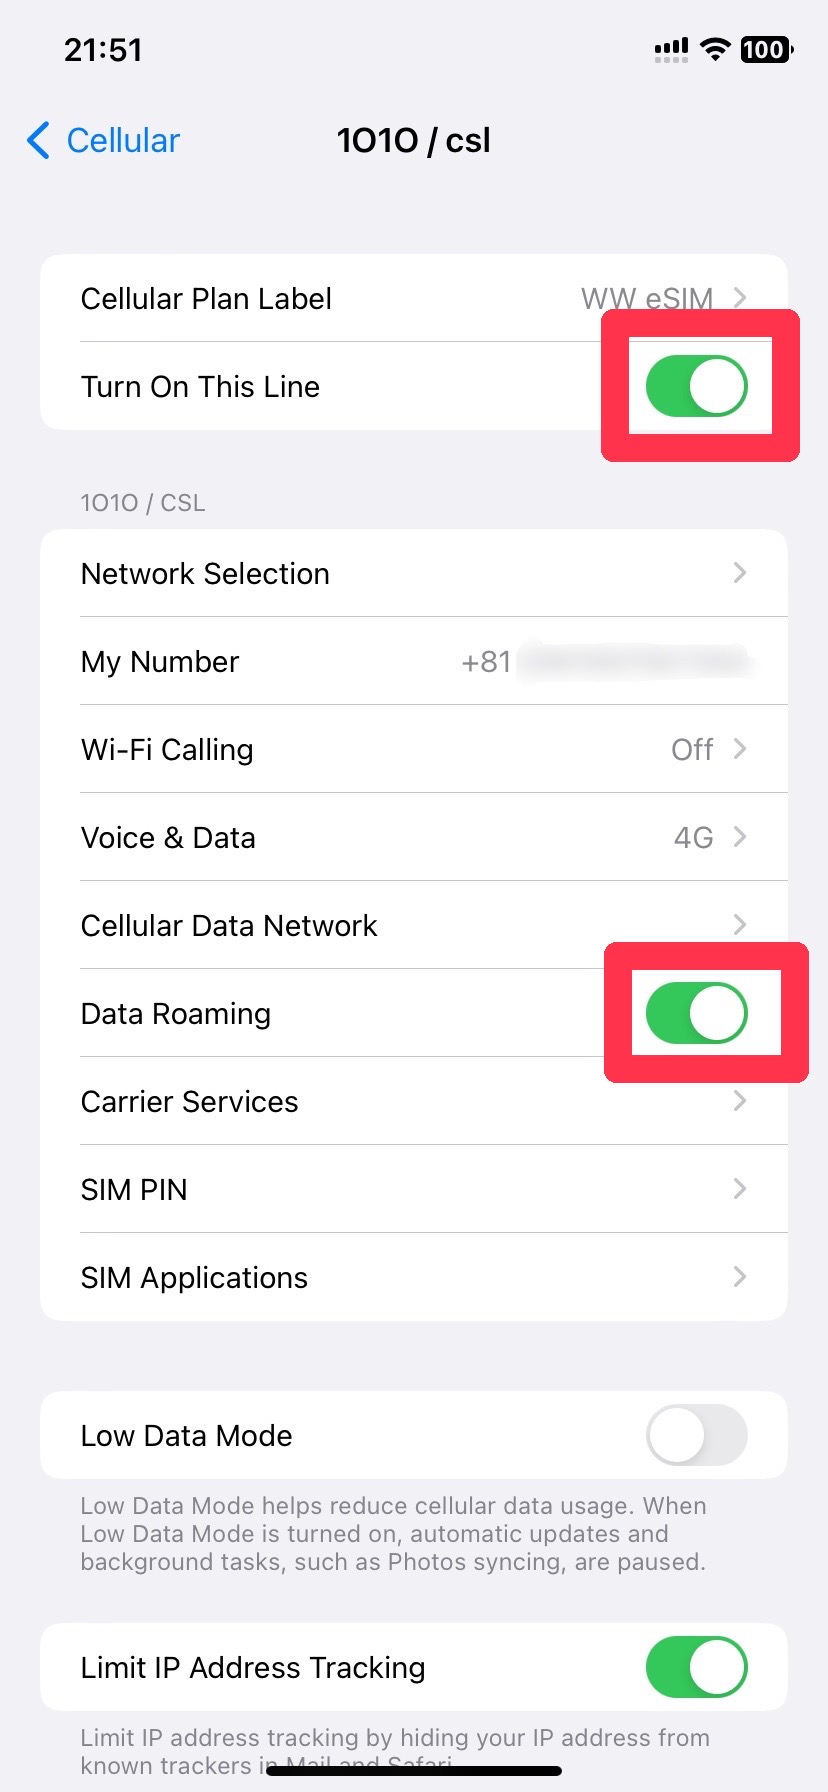
- Turn ON Network and Roaming
- Turn ON [Turn On This Line] and [Data Roaming].
- Setup Complete!
- You are now ready to use eSIM.
- Go to eSIM Installation Screen
- Open [Settings].
Go to [Cellular] and tap [Add eSIM].
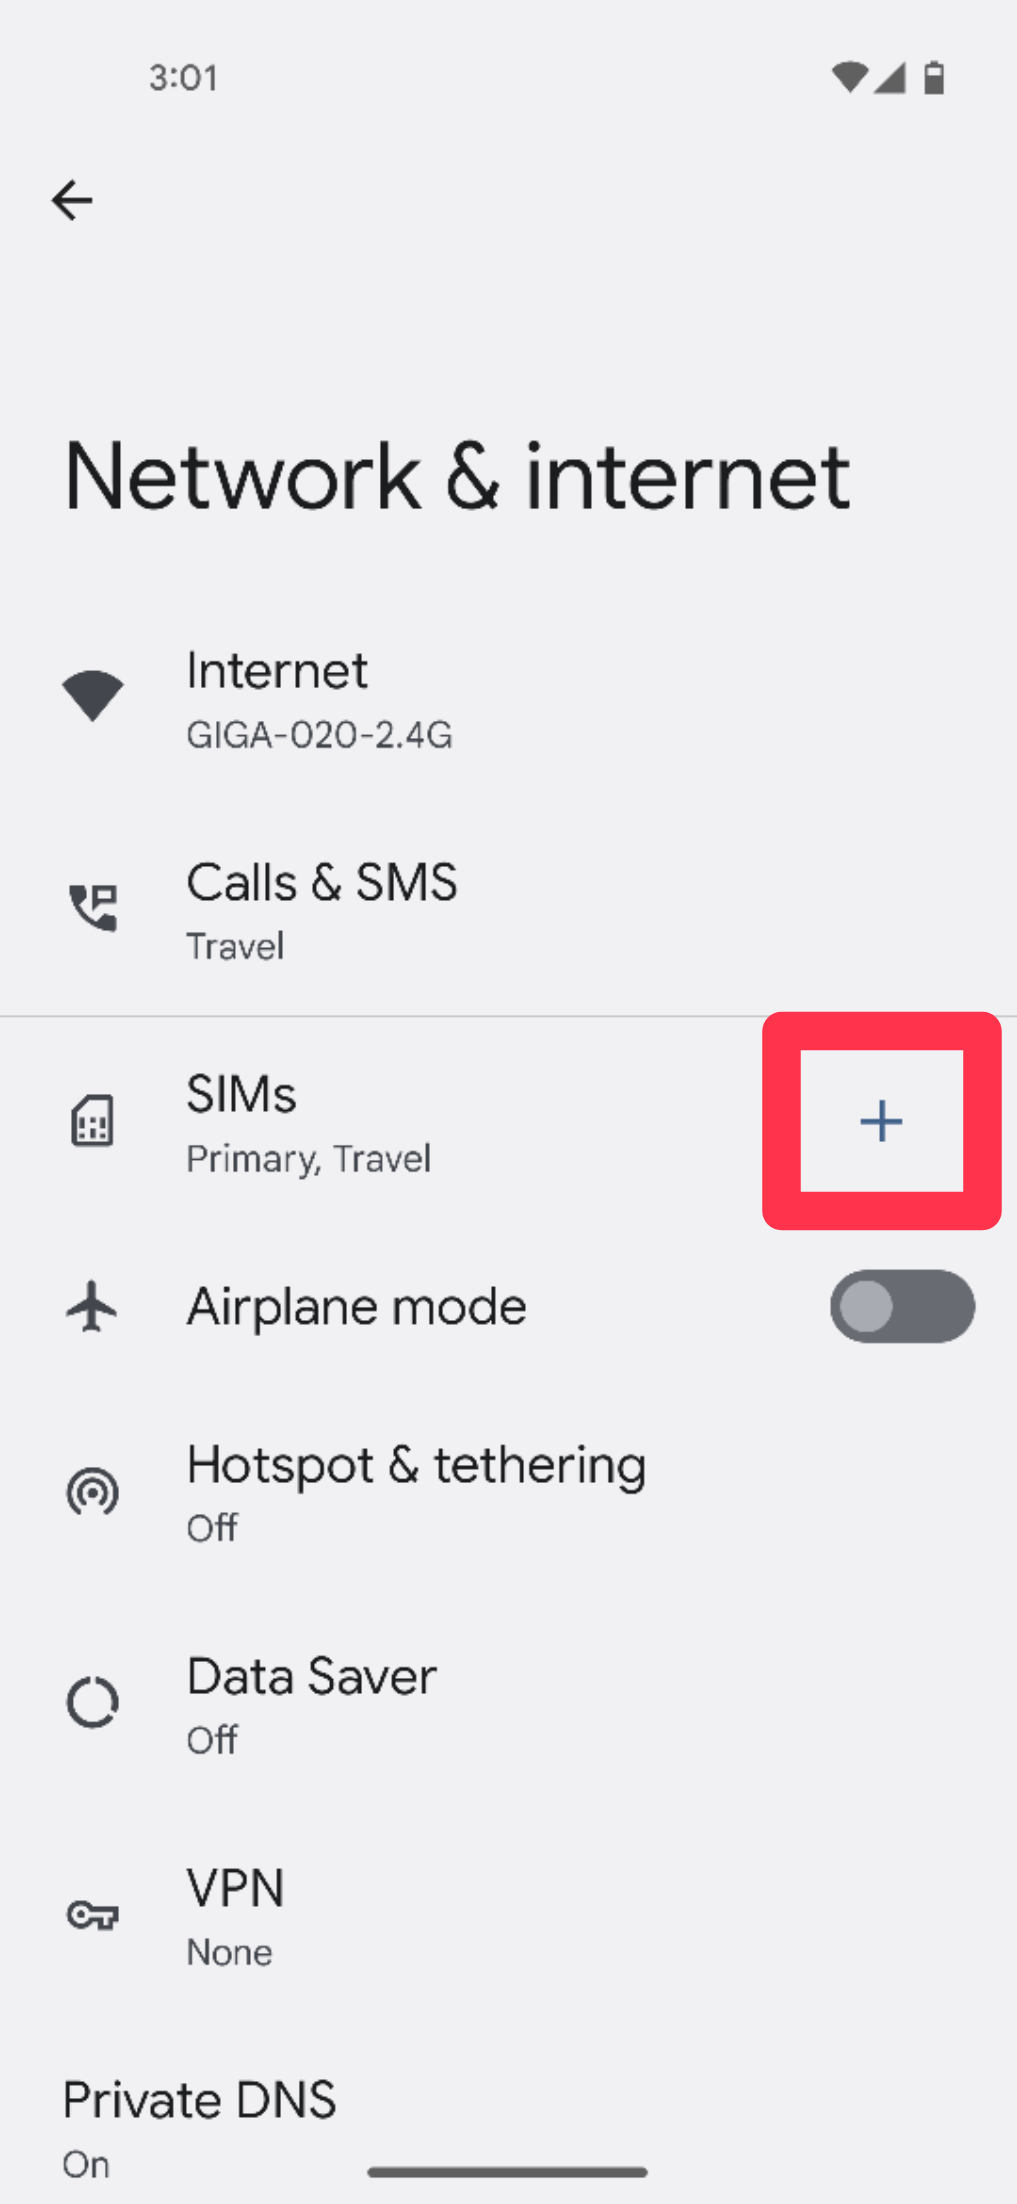
- Go to eSIM Installation Screen
- Tap the [+] icon to the right of [SIMs].
- Scan the QR Code
- Tap [Download a SIM instesd?] and scan the eSIM-QR code on your receipt.
Please wait a few minutes for the installation to complete.

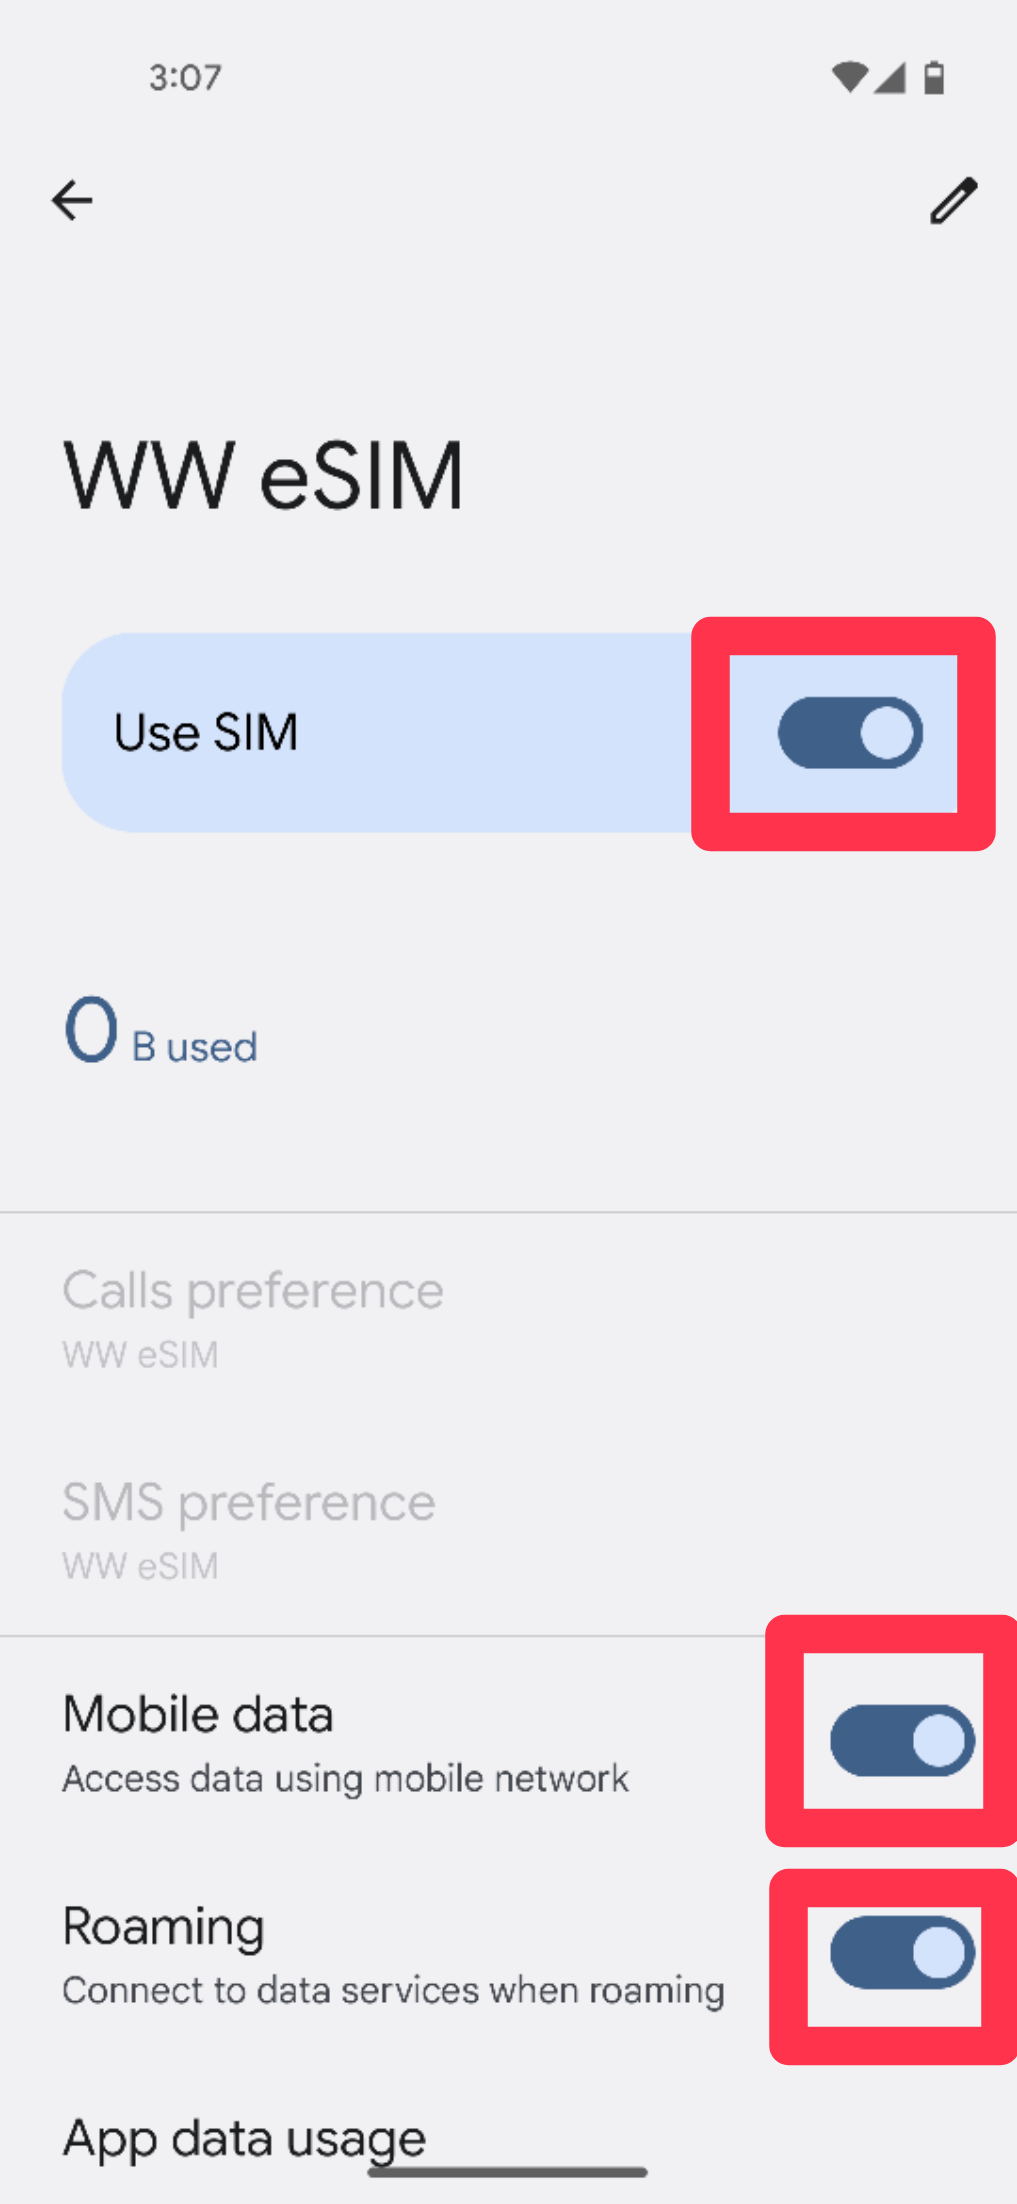
- Go to eSIM Settings
- Once installed, go to [Settings] > [Network & internet] > [SIMs] from your home screen, then tap the eSIM you just installed.

- Turn ON Network and Roaming
- Turn on [Use SIM] (a confirmation pop-up may appear).
At the bottom, turn on [Mobile data] and [Roaming].
- Setup Complete!
- You are now ready to use eSIM.